5.2.2. Creating a promotion
When clicking the 'New' link, the promotion form comes up.
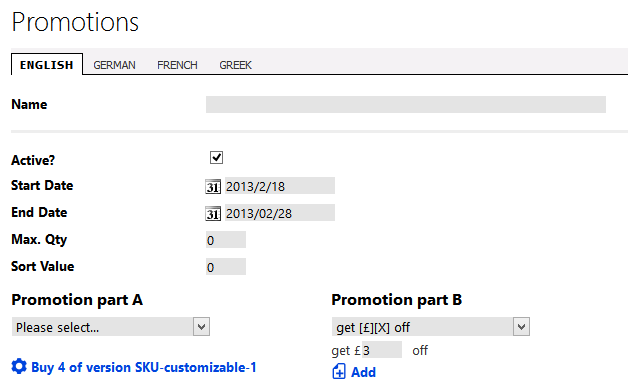
The promotion can be given a name, in multiple languages if you store supports that, and a checkbox can be set to determine if the promotion is 'live' (available) or not.
You can choose a start and finish data and you can also set the maximum number of this promotion that can be applied.
The sort value helps set the priority
with which a promotion will be treated if there are multiple
overlapping promotions (for example, the conditions of items in the
basket triggers two different promotions).
Promotions consist of two sides – the first being what the customer must spend or purchase, and the second being what they receive as a result. We refer to these as part 'A' and part 'B' for simplicity.
On the promotions page, part 'A' is set on the left hand side, and part 'B' on the right hand side.
From the first dropdown menu of part 'A', the type of promotion can be chosen. Once a type is selected, textboxes will appear to let you specify further information. For example, if you select buy [X] of [P] (buy a certain number of a certain product), a textbox appears for the quantity (X). Enter a whole number. A second textbox also appears for the product (P). Enter the name or part of a product name here, and the filtered box will display the options. Select the appropriate one, and it will be entered to the textbox. The last step is to click the 'Add' link to add this new pattern to part 'A'. It will turn into a blue link just below the dropdown menu.
Note that you can add
multiple requirements to part 'A'. So you could have a requirement to
buy one product D, and spend $10, for example.
The next step is to fill out what the customer receives on part 'B'. The process is similar to that for part 'A'. Again, remember to click 'Add' to register your selection. You can create multiple received items too.
- Spend X
- Buy 1 item from Category Y
Categories: Category-based promotions are not recursive. This means they only apply to products immediately within a category, not products nested within subcategories of the category.